


I recently helped a friend out with a project and wanted to show how I accomplished building a straightforward dynamic dashboard to display cryptocurrency prices and news articles about the market for them. I once again chose to use HarperDB, as it made powering this project incredibly easy since it handles all of the hosting, storage, and execution of our scripts.
My plan is to use HarperDB to host the RSS feed parser, API parser, frontend, and all of the other API logic required for the project. For the frontend, I am using Angular as it’s my framework of choice but you could use anything!
What is HarperDB?
HarperDB is a product I’ve discovered recently and have already released one article featuring it where I explored setting up a Digital Signage system, which you can read here. If this is your first time hearing about HarperDB, I like to think of it as a Swiss army knife as it has many great uses. It enables you to store your data and query it, host a frontend, and add custom controller functions to an API. You can run HarperDB locally or even use a Cloud Instance — which we’ll take advantage of for this. If you would like a guide on how to sign up and launch a free instance, my previous article went into great detail on the process.
Configuring the HarperDB Cloud Instance
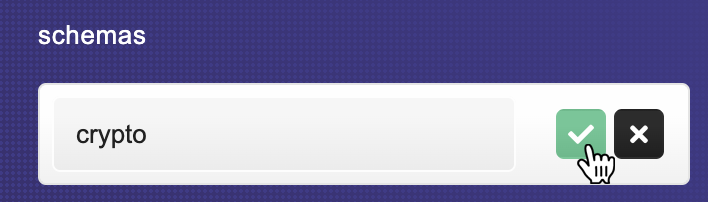
With a free Instance launched, or using a pre-existing one, we can start setting up the database side of things before we jump into the code. Once you have selected the Instance, on the ‘Browse’ tab, we can add a new Schema on the left-hand side and name it ‘crypto’, but you could name it anything you’d like.
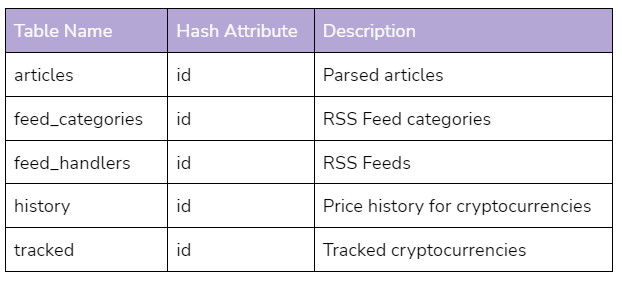
We can now add the tables required, which we can do below where we added the Schema. We’ll only need to provide the table name and hash attribute as HarperDB uses a dynamic schema so our data can take any shape we’d like. More information on HarperDB’s dynamic schema can be found in the documentation if you are interested.
Creating the RSS feed parser
To collect the articles from various sources, the easiest method is to use an RSS feed parser as almost all publications provide an RSS feed, and if not, it’s possible to create your own RSS feeds if required. We can then use a scheduled job to pull the feed and save any entries into the database as needed. A library I’ve been using for a while and had great success with is rss-parser, which also can fetch remote content for us as well. To make managing the different feeds easy, we’ll save them into the database and have the ability to add, remove and edit the feeds from the frontend we’ll set up later.
Inside the ‘feed’ route handler, a CronJob is set up that runs every five minutes (which could be lower) to parse each configured feed which then saves each non-duplicate item into the database:
https://medium.com/media/c7c812aa65db1f503571b2e0686f339a
Creating the API parser
While we can use an RSS feed for the news articles, for any pricing information we’ll have to use an API since it commonly requires specialized requests and authentication. A great price API I’ve been using is CoinMarketCap’s API which has a free tier available allowing us to make 333 requests per day at a maximum, however, in this example, I’ll only be making around 100 per day (a request every 15 minutes) but you could increase the request frequency if you wanted more up to date information and truly make it ‘real-time’.
In the ‘prices’ route handler, I’ve set up a CronJob that runs every 15 minutes and requests the latest price information for any of the configured cryptocurrencies. The User also has the option to track their holdings and show the total per cryptocurrency if desired. For an exhaustive list of available cryptocurrencies, refer to CoinMarketCap’s list here.
https://medium.com/media/796b8a85020a795022e1d20aa75bb7e3
Signing up for the API
In order to use the API, even though we are only using the free tier, we’ll still need our own API key to authenticate with. To obtain one, you can sign-up for a free account here and once you have confirmed your account the key can be obtained from your dashboard. You can also obtain your usage information here which may be useful if you ever wanted to increase the request frequency.
Once you have your own API key, edit the ‘getPrices’ helper and add your API key near the top:
API Sandbox
For the API URL, if you only want sample data and not real-world data, you can change the API URL to ‘sandbox-api’ versus ‘pro-api’ and you will not get charged for operations. This is useful when you want to add additional functionality to the code without worrying about exceeding the limits. In the code where this is used, I created a ‘USE_SANDBOX’ constant that you can change to easily swap between the two. One thing to note is that I am using the slugs of the cryptocurrency to pull the pricing as some symbols are not unique.
Creating the frontend
To power the frontend, I put together an Angular application powered by the Custom Functions allowing the User to see the available data in a trivial manner. As there is quite a bit of configuration, to edit any of the options we’ll need to navigate over to the Settings page. In the Settings, we can add additional cryptocurrencies to follow the price for, add additional news feeds to parse for new posts or add a new feed category to help separate our articles.

Code Explanation
On the dashboard, each configured price tracker is displayed using ngx-charts and a Sparkline component grabbed from their demos. In this project, I’ve left the styling to Flowbite / Tailwind CSS — which I’ve just discovered recently and have enjoyed every minute. Much like I did in the previous article, each section has its own services to handle remote requests and storing/accessing the application’s state.
For the RSS feeds, each category has its own tab where the User can click on it and see the Articles for that specific category. You could also modify the code provided and just have a single list too if you wanted. In each tab pane, the articles are listed with the titles and the publication name.
Building the Frontend
Before building the frontend when we deploy the project, we first need to update the URL used for the API as it is currently pointing to a sample URL. To do this, we’ll need to edit the files within the ‘src/environments’ folder as shown:
If you are unsure of what your Instance’s Custom Functions URL is, it is displayed in the bottom left corner when viewing the Custom Functions tab, which we’ll explore in the next step. We don’t need to build the Frontend right now, as the deploy script will build it later automatically so we can move on to the Custom Functions.
Custom Functions
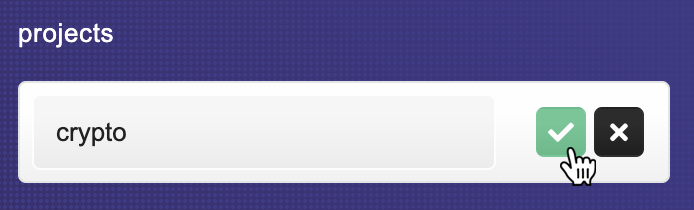
By default Custom Functions are not enabled on a new Instance, so after selecting the Instance in HarperDB Studio, navigate to ‘Functions’ and click ‘Enable Custom Functions’. After it has been enabled and has finished setting up, we can add a new project to hold all of our code. I’ll name this project ‘crypto’ to keep this code separated from any of my other code, however, much like the Schema, you can name it anything you would like — it doesn’t have to match the Schema as I’ve done here.
HarperDB has the ability to deploy a Custom Function package to an Instance which we can use to easily load all of the routes, helpers, and frontend projects needed for a project. Normally, you would transfer the package from one Instance to another, however, we can use the HarperDB API to load it ourselves using a script I’ve prepared, which you can find in ‘scripts/deploy-custom-functions.js’ in this article’s code repository.
The first thing we’ll need to do is update some of the configuration constants in the script. For example, I’ve configured mine as so:
After making the edits, we can execute the script to upload the package:
With this step finished, we can navigate back to HarperDB Studio and see the new Custom Functions project that has been uploaded.
Overview
Each part of the project has its own route files to separate everything as there are a handful of routes per section. I’ve also separated each helper into its own file as I’ve found it helps keep the code cleaner.
To enable authentication for the API routes, I copied the helper I wrote for the previous article (validateBasicAuth) that takes the authorization information from the User and checks it against the underlying HarperDB Instance. You could always disable the authentication checks, but locking it down guarantees it’s only you using your own data. Some of the endpoints required multiple validators, so I also copied the chainValidators helper from the previous project to help with this as well.
Duplication protection
To prevent the feed parser or API parser from running twice, it utilizes proper-lockfile to ensure only one instance is running at a time to prevent extra usage from occurring in case it is somehow triggered more than once. Debug routes have been included which can release the locks if needed, but the system should manage it correctly as is.
Running the Project
Since the frontend is packaged with the Custom Functions, running the project is super simple. We can just navigate to the ‘/static/’ folder at the end of our Custom Functions URL endpoint to load it. For example, my URL was:
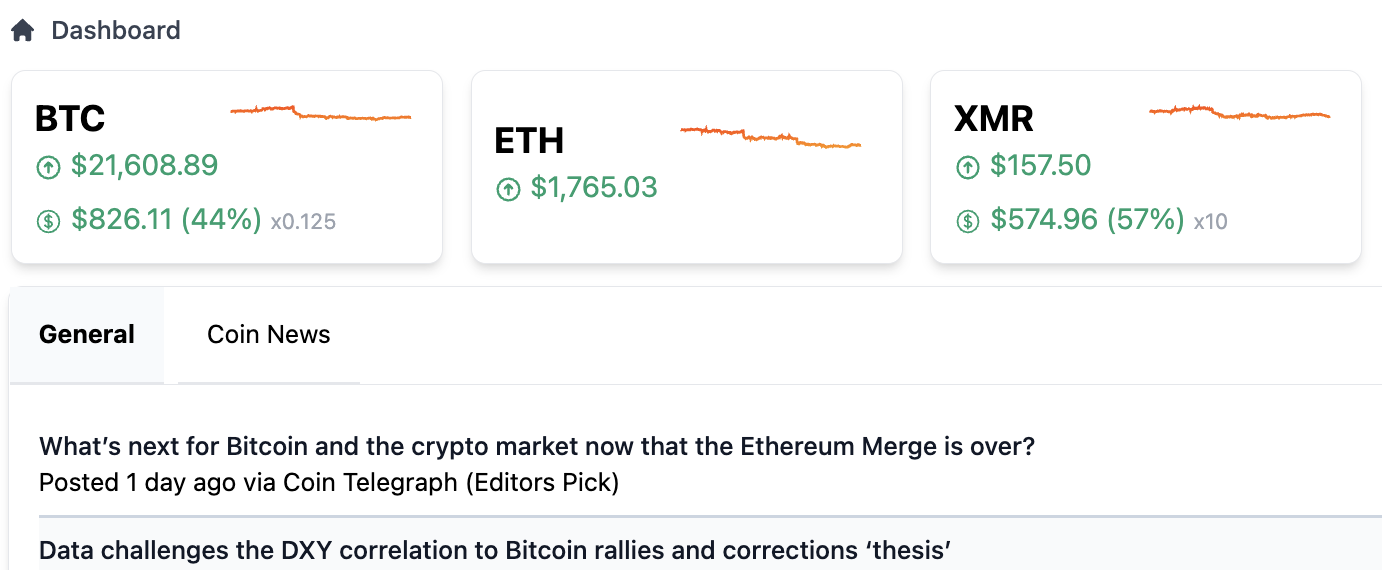
After logging in using the Instance credentials, navigate to ‘Settings’, and select a new cryptocurrency to track and fill out any portfolio information if desired. Once saved, to add an RSS feed, we first need to add a Feed Category. Once added, we can easily set up a new RSS feed handler below for new coins using the following settings:
https://gfycat.com/kindlyweirdcoral
When adding a feed, you have the option to change the settings object passed to the underlying parser. This way you can add any additional fields required or set a specific User Agent for example. With these details added, we can navigate back to the Dashboard and see the changes we’ve made.
From here, we could add additional Feed Categories and add additional feeds or track additional cryptocurrencies. You could also extend the code to add extra functionality where desired such as adding different article sources like social media or email. It would also be pretty neat to be able to click on each tracked coin and open a larger price history chart with extra information.
Conclusion
All things considered, this was another straightforward project thanks to HarperDB. The great thing about this project is that there is a lot of extra functionality that could be added quickly and easily. Also, since HarperDB offers a free tier and we are using all free data sources — this project costs us absolutely nothing!
If you have any questions about the code used or HarperDB, feel free to leave a comment and I’d be happy to help if I can!
Resources / Links