


CRUD is a basic pattern of the web, giving us the ability to manage data of any kind, but it can be tricky to configure all the endpoints and queries needed to perform this work. We’ll use HarperDB Custom Functions with secure Next.js endpoints as proxies to create a full CRUD API. (If you prefer video demos, you can code along with Colby here).
00:00 - Intro
00:42 - Tools we'll use including Next.js and HarperDB Custom Functions
01:37 - Spinning up a new Next.js app from an Online Store Dashboard Starter
03:40 - Creating new CRUD API routes in a Next.js app
05:45 - Writing up the app UI to make requests to a CRUD API
10:34 - Adding a new Products schema and table to a HarperDB database instance
12:09 - Setting up CRUD Custom Functions in HarperDB to make SQL queries to the products table
18:25 - Making authenticated requests to HarperDB Custom Functions from Next.js API routes
22:41 - Outro
What is a CRUD API?
CRUD stands for Create, Read, Update, and Delete.
These are basic actions when dealing with any data, where we want to create data, look at it, update it when necessary, and delete it when necessary.
Putting this behind an API gives us a flexible way of managing these actions programmatically, such as from a Next.js application, by being able to make requests to an endpoint.
What are HarperDB Custom Functions?
Custom Functions are endpoints that we can create in HarperDB that will run a snippet of code or a database query and ultimately return the results.
In our example, we’ll be working with a database, where we want to perform CRUD actions, so we want to be able to make queries inside of those functions, that we can invoke by securely hitting those endpoints.
This will allow us to easily manage our logic close to our database performing the actions with a flexible way to invoke those actions from our application.
What are we going to build?
We’re going to build a CRUD API that allows us to easily manage product data for an online store.
We’ll start off using a Next.js Starter that includes some basic UI and create some API endpoints inside of Next.js.
The API endpoints will be used to make secure requests to HarperDB Custom Functions, which will perform our CRUD magic via database instance and table that we’ll first create inside of Harper, which our Custom Functions will interface with.
Step 0: Creating a new Next.js app from a demo starter
We’re going to start off with a new Next.js app using a starter that includes some simple UI that we’ll use.
In particular, we’re going to use this starter that will set you up with a page of products with some page routes stubbed out which will allow us to manage our products using our CRUD API.
Inside of your terminal, run:
Note: Feel free to use a different value than my-product-dashboard as your project name!
Once installation has finished, you can navigate to that directory.
Then you can start your local development server with:
And once you visit it in your browser at http://localhost:3000, we should see our new application!
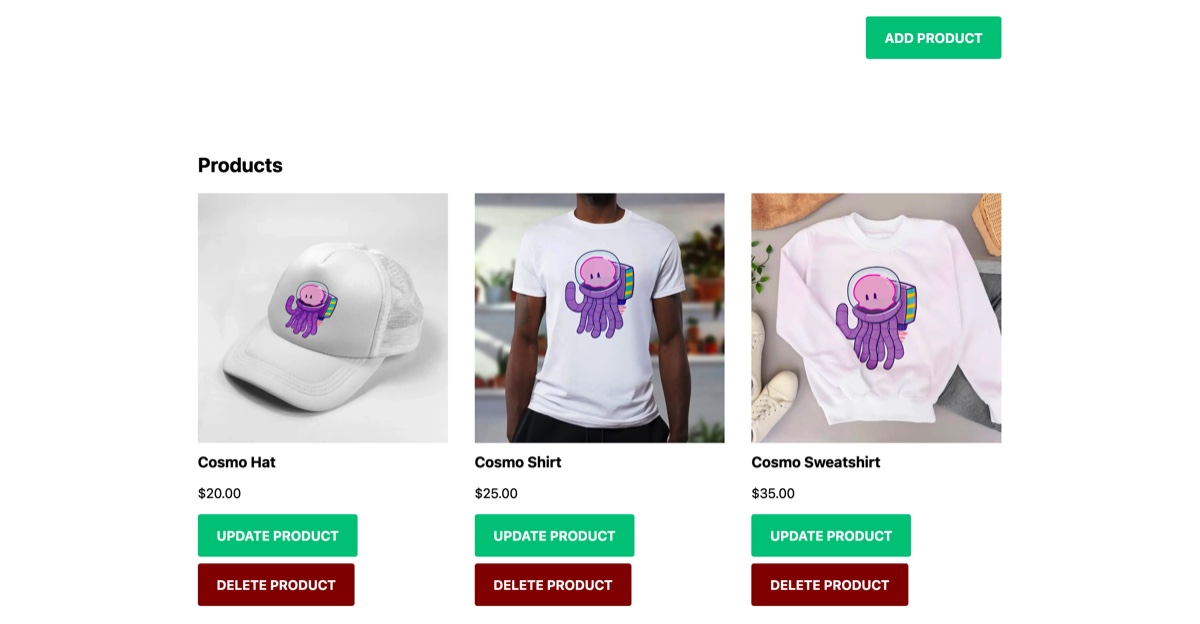
Now before we dig in, to get you a little familiar with what’s going on, we start off with our homepage, that’s currently making a request to an API route that is returning some dummy data.
This is here so that it makes it a little easier for us to customize to our CRUD API.
Moving further, we have add, delete, and update routes inside of the pages/product directory which all include a form or button that will allow us to trigger the requests to our new API, performing the CRUD action.
Before getting started with Step 1, feel free to familiarize yourself as our goal will be to focus on the CRUD API and not the API that’s triggering it.
Step 1: Setting up CRUD API routes in Next.js
As we talked about before, CRUD stands for:
•Create
•Read
•Update
•Delete
So we want to make sure we have the ability to do each and every one of these things inside of our project.
We’ll start off by creating the API routes that handle these requests, so inside of src/pages/api, first create a products directory, then add the following files:
•src/pages/api/products/add.js (Create)
•src/pages/api/products/delete.js (Delete)
•src/pages/api/products/list.js (Read)
•src/pages/api/products/update.js (Update)
Note: Notice we’re using Add instead of Create and List instead of Read. You can certainly use whatever pattern you want, but generally it’s less common to see Add and Read used as route names.
For now, inside of each of them, add the following code:
What this will do is return an HTTP status of 200 (success) with a JSON response that includes an empty object.
Now diving a bit further on our HTTP status code, a 200 for mostly all of our CRUD requests makes sense unless there is some kind of issue, which we’re not going to cover, but there’s an additional status code of 201 which indicates “Created”, so while we could probably leave a 200 for each of our routes, it might make sense to update our add.js route to return a 201:
Tip: Read more about HTTP codes over on MDN: https://developer.mozilla.org/en-US/docs/Web/HTTP/Status
We can test each and every one of these out by visiting the API route in the browser, such as:
•Add: http://localhost:3000/api/products/add
•Delete: http://localhost:3000/api/products/delete
•List: http://localhost:3000/api/products/list
•Update: http://localhost:3000/api/products/update

But now that we have all of our routes, we can set up our application to trigger these routes, then later, we’ll wire up our Custom Functions to perform the actions.
Step 2: Triggering CRUD API routes from application
Application UI can vary significantly based on the project you’re working on. If you’re working along with the Starter from Step 0, it will be a little easier to follow along, but generally when using a CRUD API, you ultimately need to make a request to the API from the UI.
Tip: Not following along with the Starter? Feel free to skip this, heading to Step 3, where we’ll create a database instance for our CRUD API.
Inside of our application we have a few spots we need to update:
•Homepage (src/pages/index.js): we want to update the request to fetch the products from the List API
•Add (src/pages/products/add.js): when the form is submitted, the handleOnAdd function should take the product data and POST it to the Add endpoint
•Delete (src/pages/products/delete.js): when the button is clicked, the handleOnDelete function should POST to the Delete endpoint
•Update (src/pages/products/update.js): when the form is submitted, the handleOnUpdate function should POST the product data to the Update endpoint
So let’s dig in.
Homepage
Starting inside of our homepage at src/pages/index.js, we are using SWR to make a request to /api/all-products which is a temporary endpoint for example purposes.
Note: We’re not going to cover SWR in this tutorial, but it’s a great way to make GET requests and manage the data lifecycle
All we have to do here is update our endpoint:
Once you do, you’ll notice we no longer have any products on our homepage! Which is expected, as previously we were rendering static data, but later we’ll make a request to our database to get our product data and display them on the page.
Add
Inside of src/pages/products/add.js we’re currently getting all of the fields from a form and storing them in a constant of product.
From here, we need to do is take that product data and POST it to our endpoint.
At the bottom of handleOnAdd add:
We’re using the Fetch API to POST our product data. We also chain on a then and convert our result to JSON, making it easier to use in the app.
Now at this point, once wired up with Custom Functions, this should work as is, however the page will stay there and not give the user any feedback, so additionally we can use the Next.js router to redirect our user on success back to the homepage.
We can see at the top of the page that we’re importing the Router and using useRouter to grab an instance of it.
So finally, at the bottom of handleOnAdd, we can add:
Where we’re saying, if we have some results, with data, and an ID, we’re good to go, so redirect back to the homepage.
Note: I know ahead of time what our data will look like, hence me using results.data.id. We’ll see this data structure later when we make things work!
Delete
Delete is going to work very similarly, only we’re going to POST to a different endpoint and send a slightly different payload.
Inside of src/pages/products/delete.js, inside of handleOnDelete, add:
We can see we’re doing just that, similar code, only this time we’re only passing the ID to the request.
The ID is obtained using router.query.id where we’re grabbing that as a query parameter from the URL.
When we link to this page and the other pages from the homepage (or wherever), we’re relying on that query parameter to make sure we know what product to delete. This will work similarly in Update.
But once successful, we need to make sure it is actually successful. The results will include “deleted hashes” which we’ll see later, which is our ID, which we want to make sure it includes, meaning it successfully updated.
Update
And finally Update, which will look like a mix between Add and Delete.
Inside of src/pages/products/update.js, at the bottome of handleOnUpdate, add:
The biggest difference as usual is what we’re passing to the request.
We first pass the ID that we want to update, but similar to the Add page, we grab the product data from the form that’s being submitted, and pass that along to the body, so that our endpoint knows what ID to update and all the data to update it with.
We’re also similarly checking for “updated hashes” this time instead of deleted.
But at this point, we have each of our pages set up to interact with our endpoints, and now we’re left to wire things up to Harper!
Step 3: Configuring a new database instance and table in HarperDB
When building a CRUD API, the point is to perform each of those actions on a set of data, so now’s our time to set up that data.
To do this, you’ll need a HarperDB account and a new (or existing) database instance where we can set up our Table.
Tip: Not sure how to set up a new database instance? Check out this previous tutorial!
Once you’re logged in with that database instance, we’re ready to create our new Table.
We first want to create our Schema, which will allow us then to create our Table inside.
On the left side of the page, we should see an empty field where we can enter the name of the Schema.
You want to try to think of a name that’s going to allow you to relate multiple Tables to the same idea.
For our purposes, we want to manage products, so I’m going to name my Schema “products”.

Once ready, click the green checkmark to create your Schema.
Next we want to create a Table.
The Table is going to be the more specific representation of the actual data we want to store.
Because we’re going to store the info for each of our products, we can use “skus” (or Stock Keeping Unit) which represents that we’ll have a bunch of products where each will include a unique SKU.
Tip: Why use SKU? While we have a bunch of products, each product may have different SKUs, such as a shirt with different colors. While we’ll be keeping it simple with one SKU per product, this will help provide better organization for your online store.
When defining a Table, we also need to define a Hash Attribute, which will be a unique identifier for each SKU. While we could technically use SKU, it makes more sense to have a database entry ID configured by Harper during creation, which will just help use maintain reliable and unique values, so enter “id” for the Hash value.Cap

When ready, click the green button again, and now we should see our table to the right, where we currently don’t have any records (expectedly).
Now you may be asking, what about column configuration? The cool thing about HarperDB is we don’t need to define our columns.
When adding our data, Harper will automatically create our columns based on the data we provide, making it easier for us to manage!
Next, we’ll learn how to set up our Custom Functions and after, finally invoke those Functions, which will add and manage our product data.
Step 4: Adding HarperDB Custom Functions to Create, Read, Update, and Delete (CRUD) data
On top of their database solution, HarperDB offers Custom Functions which are a way to create API routes that let you make queries and manage your data inside of Harper.
Tip: Why do we need to create API routes twice? We need to invoke our Custom Functions serverside when providing an API key to avoid compromising our credentials and database, so we can use serverless functions as a way to create a secure proxy!
In our case, we have four Functions that we want to create:
•List
•Add
•Update
•Delete
So we’ll start off by enabling Custom Functions for our database instance then we’ll create a new Function for each action.
Setting up Custom Functions
First, we need to set up the ability to use Custom Functions.
Head over to the Functions tab where you’ll first be greeted by a button that states that we need to enable Custom Functions.

Click Enable Custom Functions and the instance will restart, enabling the feature for us.
Once restarted, HarperDB will give us the ability to set up a new API project.
We’re going to be creating Functions that interface with our product data, so let’s name our project “products”.

As usual, when ready, click the green checkmark button.
Once created, HarperDB will scaffold your new Custom Functions project including setting up some example routes and helpers to make sure we can hit the ground running.
Select the examples route item on the left and inside you’ll see all of the server routes in the example.

For now, we’re going to leave this example “as is” so we can reference later.
Tip: we won’t need any of the routes inside of the examples item so you can alternatively just delete it.
Click the plus sign under routes to add a new one, and let’s call it “skus”.
You’ll notice that once complete, Harper gives us some starting code to work with where now we can start defining our functions.
Let’s start off by deleting all of the code inside of our exported async function (the two server routes) as we’ll be copying and pasting in the code below.
We also want to get rid of the two require / imports at the top needle and filter as we won’t be using them and may cause errors for us trying to move forward with them there.
But now let’s create our routes!
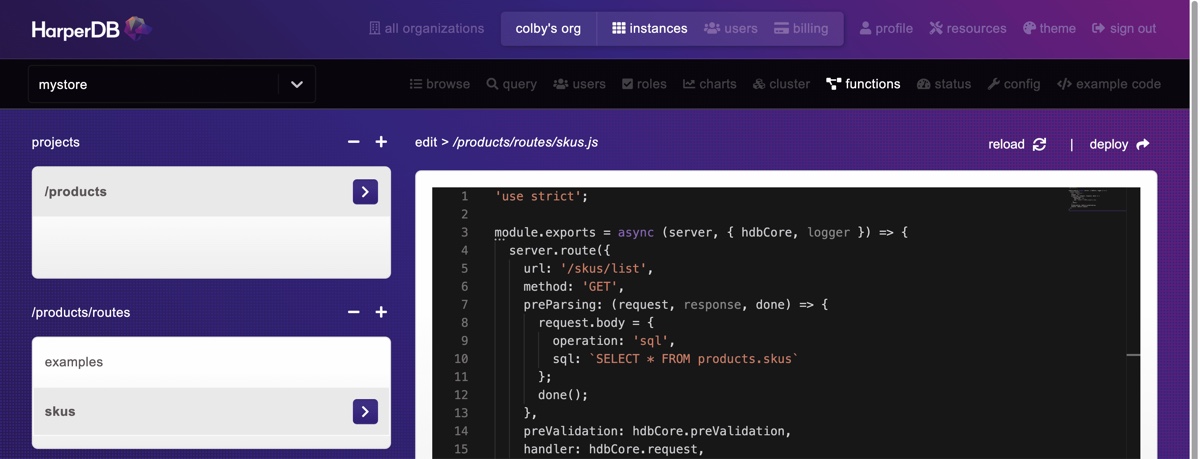
Reading product data
Our first route we want to create is to get all of our SKUs.
This is a basic SQL lookup of our table.
Add a new server route definition by pasting in the following:
Here we’re:
•Defining our new server route as /skus/list which will end up being available at /products/skus/listas it’s nested inside of our products routes
•Making a GET request
•Using the preParsing hook which allows us to manipulate the body before the query is made
•Passing in the default preValidation and handler as provided by HarperDB and their provider which makes sure our request is validated and authenticated
Hit the big green save button (floppy disk) then click Deploy at the top right of the editor and your after a few minutes our Function should be available!

Tip: Clicking Back to Edit where the Deploy link was will take you back to the editor
Now we’re not yet going to be able to fully test this out without using an app like Postman or setting it up in our application (which we’ll do later on), but we’ll at least be able to get an idea of what’s going to happen.
If we scroll down on the left hand side of the Custom Functions page, you should see a section called Custom Functions Server URL that has a URL. This is going to be our endpoint domain.
Mine for instance is:
Putting together the full endpoint for our new GET request, we have our Server URL, our base route of /products, and our GET route of /skus/list and when putting them all together we have:
If we try to hit that in the browser, we should get an error that says “User not found”. This is because we’re not providing authentication on the request, so it’s expected.
If we were authenticated though, at this point we shouldn’t see data anyways, as we have none yet!
Creating product data
Next we want to create the data if we don’t have any for a particular SKU.
Right below our GET route let’s add:
Here we’re:
•Defining our endpoint at /skus/add
•This time using POST as we’ll be passing in data to the body
•Using the preValidation hook to modify our body, taking the product data we’ll pass in and create an Insert operation from it to our products table
•That Insertion includes our product as a new record, which will have all the data we need for our product info
Like before, we won’t be able to see this work yet, so moving on to Update.
Updating product data
Below our Add endpoint add:
Here we’re doing something pretty similar to our Create but we’re:
•Using the Update operation
•Adding the product passed to the body
Importantly the product includes an ID which refers to the database record ID, needed to update the right SKU.
Deleting product data
And lastly, we want to be able to delete a SKU.
Below our Update endpoint add:
Here we’re:
•Using the Delete operation
•Using the product record’s ID to associate it with an existing record
And that’s all we need to Delete.
Tip: Using tools like Postman is a great way to build and test APIs without having to work inside of an app every time. If you’re not familiar with Postman, check out my tutorial How to Use Postman to Test APIs and Manage Collections.
Next we’ll finally put all of this to work!
Step 5: Using Next.js serverless API functions to securely make HarperDB Custom Function requests
Now we’re finally ready to finish our API routes to make requests to our Custom Functions.
Setting up HarperDB environment variables
Before we hit our endpoints in the application, we need to make sure we can do so securely and know which location to make requests to.
To do this, we will use our HarperDB API Key and Functions URL.
Before we grab them, create a new file at the root of the project called .env.local and inside add:
Next let’s find our values.
Starting with the Functions URL, if you’re still inside of the Functions tab, if you scroll down on the bottom left, you’ll see Custom Functions Server URL.

Copy this value, whether using the icon or copying the text, and paste it into the HARPER_FUNCTIONS_URL variable value.
Next, our API key.
Inside of the HarperDB Instance dashboard, navigate to the Config tab and once there, you’ll see Instance Overview with your Instance API Auth Header (API Key).

Click the copy button next to your API key, which will copy it to your clipboard, where you can then paste it inside of .env.local.
Note: Even though the API Key shows “Basic” in front of it in the dashboard, it will only copy the key, which is all we want to store in our environment variable.
It should look something like:
And now we’re ready to set up our endpoints.
Get all product data
To start off, let’s build our GET request to list out all products.
Inside src/pages/api/products/list.js, update the code to:
Here we’re:
•Setting up our request options that includes our Authorization header with our HarperDB API Key that we already set as an environment variable earlier
•Creating a URL that includes our database URL and Custom Function route
•Making the request and passing back the results
If you hit this endpoint in your browser, such as:
We should now see a successful response, but we don’t get any data!

Similarly, if we go to our main homepage, we won’t see any products.

This makes a lot of sense because we haven’t yet put any data into our database, which we’ll do next.
Create product data
Next we want the ability to create our product data.
Inside src/pages/api/products/add.js , update the code to:
Here we’re:
•Grabbing our product data from the request body
•Using the data to create a body for a POST request
•Setting up our URL and make the request
•Passing back the resulting data which includes the results of the request, but also using the inserted hash value which is the ID of the newly created product record
We can’t test this out by simply visiting the URL in our browser, but let’s try to add a product using our form.
Click Add Product on our application homepage and try adding some product data.
Tip: You can use the sample product data inside of src/pages/api/all-products.js as an easy way to follow along!
In the form, enter the product data.

Then click Add Product which once the request is successful, will redirect you back to the homepage.
Bonus: because we’re using SWR, once we hit the homepage, we should automatically get a new request to our list endpoint, which should now show our new product!

Now before we move on, what just happened? Well, we added a new entry to our database!
If we head back into Harper and navigate to the Browse tab, we should see under our skus table our new product.

As we work with our CRUD API, any action we take will impact this Table, whether adding, updating, or deleting.
Note: At this point, feel free to add other products including the rest in the sample product data.
Updating product data
Now we want our endpoint for updating a product record.
Inside of src/pages/api/products/update, update the code to:
Here we’re doing basically the same thing as Add, only we’re returning the results, rather than the new product.
The important distinction is that our body will include the ID of the product we want to update.
To test this out, we can make a change to one of our products. For instance, instead of Cosmo Shirt, I want my product to say Cosmo Tshirt.
Click the green Update Product button on the homepage, make any changes you want, and click Update Product again.

Like before, we should see a successful Update and once complete, we’re redirected back to the homepage with our updated product.
You should also now see that entry updated in your database!
Deleting product data
Finally, we want to also delete data.
Inside src/pages/api/products/delete.js, update the code to:
Here as usual, we’re doing a similar thing, only hitting the delete endpoint and only passing in the ID from the body.
To test this, we want to now navigate to Delete Product and confirm our action.
Note: this will delete the product from your database!
Where when we click Delete, we should see our delete request successfully trigger and head back to the homepage where we should no longer see our product listed.

And as usual, you should no longer see that entry in your database.
But now we have our full CRUD API giving us the ability to interact with a database to fully manage our products!
What else can we do?
Set up categories
Similar to how we set up SKUs, we can set up Categories that we can manage.
The trick here is we want our SKUs to relate to our Categories, meaning we’ll want to store the Category ID(s) on our SKUs so we can easily figure out what products belong to what categories.
Add search to the dashboard
We want our product managers to have an easy time to work with our products, and if we have a lot, it will be hard to look through them all.
Try using clientside search or a new Custom Function that will query the data based on keyword.